Scenario
- I have a Gmail address (e.g.:
free@gmail.com) - I have a domain (e.g.:
example.com) - I want to make a custom email address with own domain (e.g.:
hello@example.com) - I want to receive all the emails sent to custom email address in my Gmail
(e.g.:
hello@example.com->free@gmail.com) - I want to send email from custom email address while sending emails from my Gmail
(e.g.: select
hello@example.comas sender fromfree@gmail.com)
Solution
Set up email forwarding
The first step is to set up email forwarding in the domain management dashboard. I am using Dynadot as my domain name provider. The following process should be similar to other domain providers too.
Go to
My Domains > Manage DomainsClick on the
DNS SettingsIf you are using Dynadot DNS switched on - Keep Dynadot DNS - Add a record in
Domain Recordwith the following information: - Record Type:Email Forwarding- Alias:hello- Email:free@gmail.com- ClickSave DNSIf you are using custom DNS switched on - Select
My Domainsfrom the left-side menu bar and clickManage Domainsin the drop-down. - Check the box next to your domain name(s) and click on theBulk Actionbutton - ChooseEmail Forwardingfrom theBulk Actionlist - On theEmail Settingspage, select theForwarding Emailsetting from the top drop-down menu - Enter in the email address you want for your domain email in theUsernamecolumn (you do not need to enter the full email address such asemail@yourdomain.com, only theemailpart should be entered from this example) - Enter an existing email address that you want your email forwarded to in theExisting Email Addresscolumn (e.g.:free@gmail.com) - If you would like to create additional aliases, click on theAdd Emailbutton - Press theSave Email Settingsbutton to save your changes
Send an email from your alias in Gmail
- Step 1: Generate your app password
- On your computer, go to your Google Account.
- At the left, click
Security. - Under
Signing in to GoogleclickApp passwordsand sign in, if required. - If you don’t find
App passwords, click2-Step Verificationand follow the steps to turn on 2-step verification for your account. You may have to sign in again. - Under
App passwords, clickSelect appand thenMail. - Click
Select deviceand thenOther. - Enter the name of your domain and click
Generate. - From the app password box, copy the 16 character password generated. You’ll need this address when you add your new send-as (forwarded) account (in Step 2 below).
- Step 2: Add an email alias
- On your computer, go to Gmail.
- At the top right, click
Settings. - Select the
Accounts and importorAccountstab. - In the
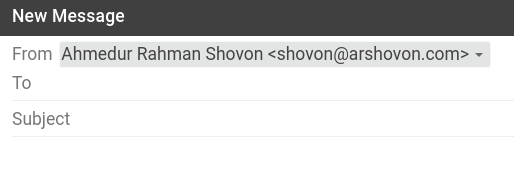
Send mail as, clickAdd another email address(e.g.:hello@example.com). - In the window that opens, enter the name you want recipients to view.
- Enter the email address alias you’ve set up for email forwarding.
- Confirm that
Treat as an aliasis marked, and click Next step. - In the
SMTP Serverfield, enter:smtp.gmail.com. - From the
Portmenu, choose587. - In the
Usernamefield, enter the username you’re signed in with. (e.g.:free@gmail.com) - In the
Passwordfield, enter the 16-character generated app password that you copied in Step 1. - Confirm that the
Secured connection using TLSbox is marked. - Click
Add account.
- Step 3: Confirm the address
- On your computer, go to Gmail.
- Open the confirmation message you received from Gmail.
- Click the
link.
Update (May 2026)
Gmail aliases no longer work with Google’s Advanced Protection Program
Google disables App Passwords for accounts enrolled in the Advanced Protection Program (APP).
Once APP is enabled, previously generated App Passwords are revoked, which prevents Gmail SMTP authentication from working for custom “Send mail as” aliases.
As a result:
- Receiving forwarded emails (
hello@example.com→free@gmail.com) still works normally. - Sending emails from the custom address through Gmail (
hello@example.comviasmtp.gmail.com) no longer works.
This limitation is caused by Google’s security restrictions on legacy SMTP authentication methods used by the alias setup process described above.
Current workaround
At the moment, there is no direct workaround while keeping Advanced Protection Program enabled.
Possible options are:
- Disable Advanced Protection Program and generate a new App Password.
- Use a dedicated email hosting provider instead of Gmail alias forwarding.
- Configure a custom SMTP server provided by your domain email host.
For users who only need email forwarding and receiving capability, the forwarding setup described above still functions correctly.
Reference
- How do I set up email forwarding? - Dynadot Blog
- How to combine custom DNS with Dynadot Email forwarding?
- Send an email from your alias in Gmail
- Setting Apex record for custom domain for Github site
- Common questions with Advanced Protection Program
Advertisement